The earliest forms of scrying relied on nature and took place outside. The various nature methods involve either sight or sound, although sometimes they can overlap and involve both.
Sight
Wave Scrying
Wave scrying involves watching the waves on the beach. Watch as they rise and fall rhythmically, the sunlight or moonlight playing off the waves. Listen to the sounds as they crash on the shore.
You may start to feel a strong sense of being pulled toward the water – it’s important to make sure you’re located in a safe place with no risk of tumbling into the water.
Smoke Scrying
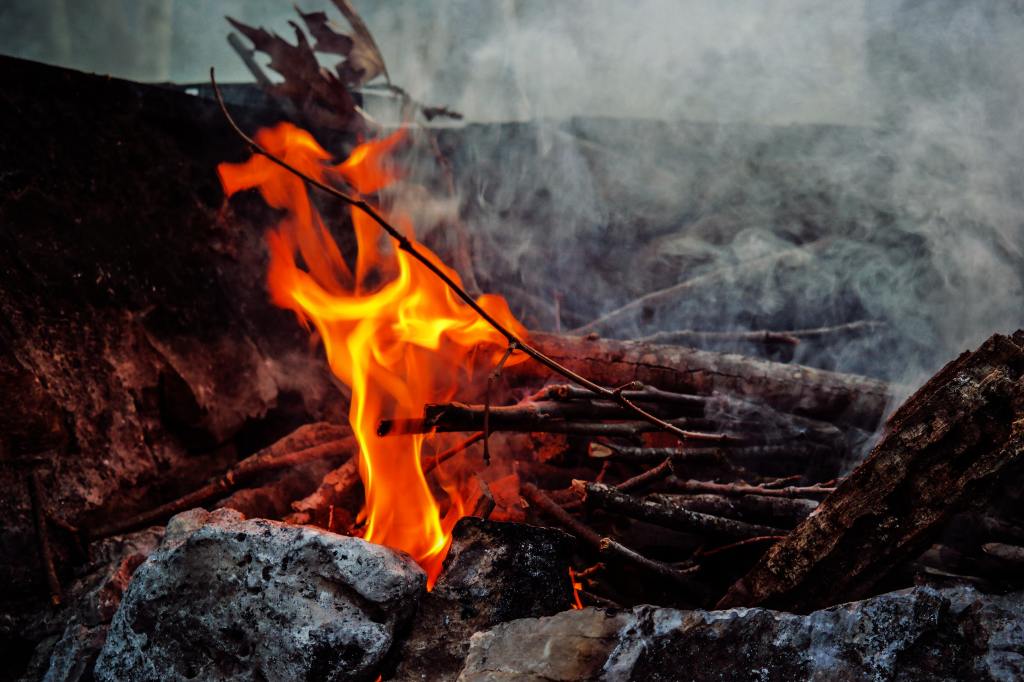
Smoke scrying is a type of fire scrying. On a quiet evening when everything is still, make a campfire. Sit or lay in a comfortable position in sight of the fire. The smoke is a great medium for visions and you may even hear the crackle of the wood speaking to you.
Watch the smoke rise, but don’t follow it with your eyes. Allow the smoke to rise past your line of sight. Focus your awareness on the smoke, then past it. You will start to see visions in the smoke.
Cloud Scrying
Cloud scrying involves gazing at the clouds and seeing shapes and visions. The weather must be warm and pleasant. Sit or lay outside somewhere comfortable – you’ll be there for an hour or longer. Make sure you are alone or isolated so you won’t be disturbed.
The cloud conditions must be good in order to employ this method of scrying. If there are too few clouds in the sky or if the sky is very overcast, this method won’t work. The best conditions are when the clouds are thick and moving slowly across the sky. There should be patches of blue sky peeking through, with strong sunlight and shadows playing on the clouds.
Gaze up at the sky, at the clouds, and let the clouds roll through your vision without fixating on anything in particular. Allow your attention to be drawn where it wants to go. You’ll see visions and shapes in the clouds.
Sound
Shell Hearing
Shell hearing involves holding a shell up to your ear. Find a large, pretty shell with a decent sized opening. Make sure you can easily and comfortably hold it up to your ear. If you live near the ocean, you can go find a nice shell to use on the beach. Otherwise, you can find shells at gift shops and craft stores. Experiment with different shells until you find one that feels right.
If you’re left handed, hold the shell up to your right ear; if you’re right handed, hold the shell up to your left ear. If you are hard of hearing in one ear, use the stronger one. When you hold the shell up to your ear, you’ll hear a rushing pulsing noise, like waves on the beach. Listen to the noise and allow yourself to be lulled into a receptive state. You will start to hear fragments of distant conversations.
At first, you may only be able to make out a word or two, but eventually you’ll be able to understand whole conversations. The words and sentences will be meaningless at first, but you’ll start to notice the voices responding to your mental comments and engaging in conversation with you. Shell hearing is the easiest form of clairaudience and produces frequent, consistent results.
Waterfall Scrying
Listen to the sound of running or falling water. Allow the sound to lull you into a receptive state. As you listen, it will start to sound like conversation. After a while, you’ll be able to make out the voices and words. If you listen with your eyes closed, you may start to see visions and pictures in response to your questions.
Wind Scrying
Listen to the wind whistling through the trees and such around you. It sounds like human voices and is easy to hear even if you’re not psychic. Sit or lay close to a tree that creates a lot of sound in the wind. Listen attentively and you will start to hear voices in a short time. You will hear them through the sound the wind makes rustling the grass and stirring the leaves in the trees. You can even talk back and have a conversation.
Next week we’ll start talking about divination and the differences between divination and scrying! So check back soon!
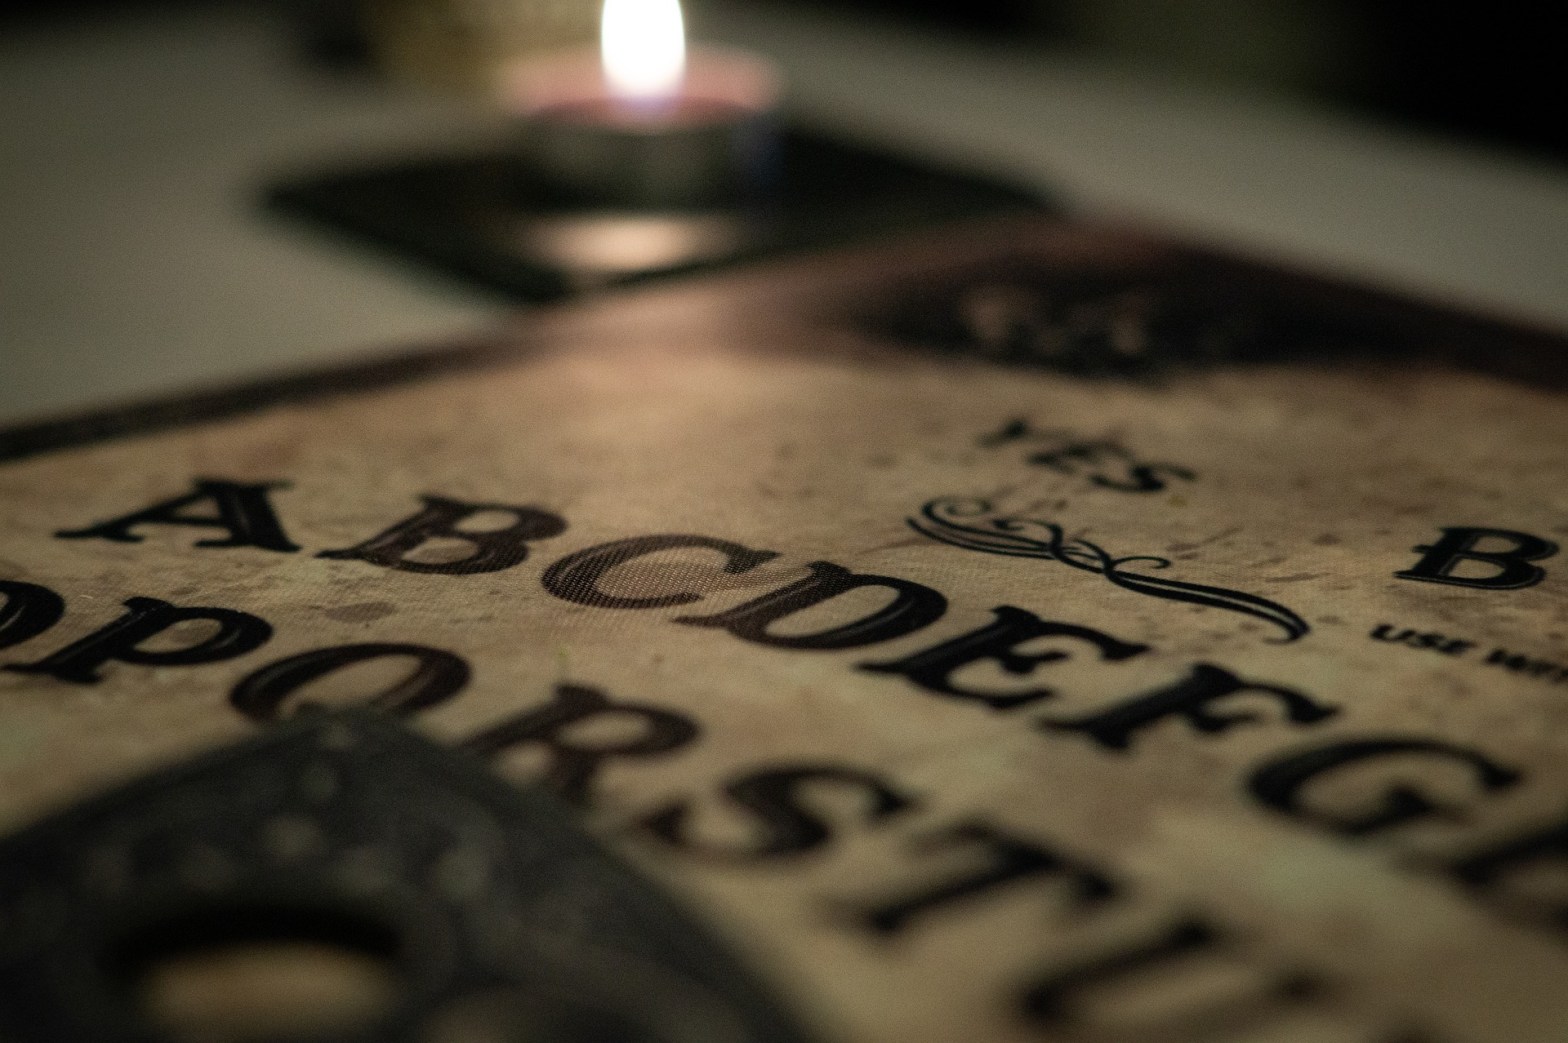
The modern day Ouija board is a mix of two older methods of scrying. The first is where the letters of the alphabet on the board came from. The wheel of letters of the alphabet was made by laying out small slips of paper with letters on them on a smooth table. An inverted wine glass was placed in the middle. The scryers would sit around the table and place their index fingers on the base of the glass. When they asked questions, the glass would slide of its own volition to spell out the answers. This method was very popular in the 19th century, and perhaps even before that. This is a simple adaptation of the pendulum method of the Romans we talked about last week. The earliest form was the ring/basin pendulum scrying method.
The second method is where the pointer came from. The pointer is the triangular or heart shaped board, slightly smaller than a human hand. It has three legs that elevate it about an inch. This tool was invented in 1853 by French “spiritist” (spiritualist) Planchette (thus, the pointer being called a planchette). He originally invented it as an aid to automatic writing. The planchette had small rollers on the two rear legs and a hole in the tip for a pencil, forming the third leg. A sheet of paper would be placed underneath it and the automatic movements of the operator’s hand would cause the pencil to write.
Most people are familiar with the Ouija board, but if you are not, here’s a common modern day Ouija board:
History
The word ‘Ouija’ literally translates to yes-yes; the french ‘oui’ and the german ‘ja.’ The origins of the word are unclear, but Oxford English Dictionary cites 1904 as the first use of the word.
In 1854, Adolphus Theodore Wagner patented the first “talking board” (or psychograph) in England. Then in America in 1891, Elijah J. Bond was granted a patent for the first modern Ouija Board. The patent was purchased the following year by William Fuld who started manufacturing them under the name “Oriole Talking Boards.” His company, Southern Company of Baltimore, was later renamed the Baltimore Talking Board Company.
In 1966, the Parker Brothers bought the rights to the Ouija board and moved production from Baltimore to Salem, Massachusetts. This was right at the dawn of the hippie revolution and the Age of Aquarius, so these boards became very popular, with over two million copies shipped.
The Parker Brothers’ product was very high quality. The board was a heavy pressboard with a highly polished face and the planchette was solid hardwood with removable legs. The legs of the planchette had small felt pads on the bottoms to allow it to slide easily across the board.
Tools
If you can’t find a Ouija board or can’t afford to buy one, you can make a simple one at home! This is similar to the method we discussed in the introduction section. Write the letters of the alphabet on small slips of paper and tape them down firmly in a circle of about 18” diameter. It’s best to choose a smooth surface, like a table, for this. Make sure the circle on the table is in a place that all scryers can reach when seated around it. For a pointer, you can use a small upturned wine goblet.
Alternatively, you can write the alphabet around the perimeter of a square on a large sheet of paper or a piece of smooth cardboard. Write the first seven letters across the top of the square, the next six letters down the right side, the next seven letters across the bottom, and the last six letters up the left side. You may want to include a ‘yes’ on the middle left and a ‘no’ on the middle right; this can speed up responses. Below that, you can write the numbers 1-9. A ‘goodbye’ is not necessary.
Practice
One person alone can use a Ouija board, but they must be an experienced scryer in order to do so. It’s much easier with two or more people. To use a Ouija board, the scryers will sit facing each other, knees nearly touching. They will then place the board on their knees and set the planchette in the middle of the board, point directed at the letters.
The scryers will then place the fingertips of both their hands on the planchette and move it around in a circle for about a minute to loosen their arms. One of the scryers will ask a simple question, preferably a yes/no question, to start. The most common question to start with is “Is anyone there?” After a few minutes of questions, the planchette will start to move easier and be able to spell out answers to more complex questions.
Some people may try to deceive the other scryers in the group by moving the pointer themselves, but trickery like this is easy to spot. When someone in the circle is moving the pointer, it will slow to a stop whenever it lands on a letter and move with slow jerks. The natural movement of the pointer, however, is to slide effortlessly and smoothly, in rapid darts and small circles.
It’s best to come up with a list of questions you plan to ask before beginning. If the board is responsive, you can ask as many spontaneous follow up questions as you need to clarify. It can be very helpful to record the session so you can review it later. This can either be a third party or a tape recorder.
If you choose to use a third party, they will not scry with everyone else, but will be sitting outside the circle recording the answers. Words can be hard to pick out of gibberish if things aren’t written down. It can also be helpful to review the words, since they may be misspelled. The scryer sitting at the base of the board with the best view of the letters and numbers should call out the answers as they are indicated.
The quality of the responses you receive depends heavily on your attitude; if you approach this method seriously, seeking answers to important questions, you will receive serious answers. Responses may not always be accurate in a physical sense. Spirits often have difficulty understanding things in a physical sense and will give their best answers. They will answer you with spiritual truth.
Method
The method for Ouija board scrying is different than the others we’ve talked about. Since more people are involved, things are a little more in depth.
To begin, darken the room and light with only a single, small light source such as a candle. It is common to burn incense to cleanse the space. Sometimes, a glass of water is placed on the table to give the spirits energy.
All the scryers sit in a circle around the board. Cast your circle, say a protective prayer, and invoke your deities. Everyone places their fingers on the pointer. One of the scryers will ask if there is anyone who wishes to communicate. You will either hear a knock or see the pointer move. Start asking questions and recording the answers.
Once you are finished scrying, move the pointer to ‘goodbye’ and say some words to encourage the spirits to return to where they came from. Close your circle, thank your deities, and say a closing prayer. Extinguish your candle and incense and return your scrying materials to storage.
Occasionally, spirits will remain even after the session is over. If you notice this happening, take your Ouija board back out. Acknowledge the spirit; let them know you know they are there and say you’re sorry they have failed to return home. Tell the spirit to go toward the light and meet their guide. Tell them love is the light and they must depart from this plane immediately. Close the session again and say the spirit’s job is finished and their presence is no longer required.
Next week we’ll talk about another method of scrying – nature scrying! So check back soon!
Sources
Robbins, Shawn, and Leanna Greenaway. Wiccapedia. New York, NY, U.S.A: Sterling Ethos, 2014. Print.
Pendulum scrying is a method that dates back to the ancient Romans. The pendulum can be used for both scrying and divination, but today we’ll be talking about scrying. Since the pendulum is held in someone’s hand, it allows the mind to communicate information through muscle movements and is therefore not random. You are communicating information from your unconscious mind to your conscious mind through senses, so it is scrying.
History
In ancient Rome, this scrying was done by tying a ring to one end of a piece of thread and a wand to the other. The ring was then held over a bowl so it could bounce around off the edge. This movement would then be interpreted as answers to the questions asked.
The bowl is thought to have been made of electrum, a naturally occurring alloy made up of about ⅕ silver and ⅘ gold. The 24 letters of the greek alphabet were probably engraved into the flange of the basin. This flange would have been a broad, flat rim extending out from the sides of the basin. These sides would have risen either vertically or slightly curved inward so that the ring could strike them. The basin may or may not have been filled with water.
The wand was made of vervain, most likely still having green leaves on it. A long thread would have been tied to one of the wand, with a ring hanging from the other end so that it could swing freely within the rim of the basin and continue to bounce off the sides. The ring was probably a simple band made of electrum. Perhaps with characters engraved on it, spelling out the name of a deity. It would have also been heavy enough to bounce easily around the edges of the bowl.
The scrying table had three legs and was made up of laurel branches. It may or may not have had a flat top, but either way it supported the scrying basin. The scryer had a “turban-like tuft of hair” on his head, which was probably a braid or a narrow strip of animal hair or fur wound around the head. He would have also dressed in linen.
Modern Methods:
Ring and Glass Method:
This is one of the older methods of pendulum scrying and is similar to the method used by the ancient Romans. It continued to be used for centuries in Europe. This method involves tying a ring to the end of a piece of silk thread. This thread is then held in a water goblet or glass tumbler. Some say filling the glass halfway with moon charged water may make the pendulum more responsive. This is optional.
The scryer sits at a table with the elbow of their scrying hand resting on the table. (There is debate over which hand this should be. Some sources say your dominant hand, others say your non-dominant hand. As with everything else, you must do what feels right to you).
The scryer then holds the loose end of the thread with their scrying hand and asks their questions. These questions don’t need to be asked out loud, simply thinking them will do. The responses come in the form of tapping sounds as the ring bounces against the sides of the glass. Generally, one tap means yes, two taps means no, and a series of taps means unsure or no answer.
Ring and Cross Method:
This method uses the same posture and the same ring and thread, but uses a sheet of paper in place of a glass. The sheet of paper will have a large + symbol on it. The scryer suspends the ring over the intersection of the two lines and asks their question. Again, you don’t need to ask your questions out loud, simply thinking them will do. Some say if you place a bowl of moon charged water beneath the paper, it will make the pendulum more responsive. This is optional.
There are many ways to read these responses. 1) if the pendulum swings back and forth along the vertical line the answer is yes and if the pendulum swings side to side along the horizontal line the answer is no; 2) if the pendulum swings clockwise the answer is yes and if the pendulum swings counterclockwise the answer is no; 3) if the pendulum swings clockwise or counterclockwise the answer is yes and if the pendulum swings back and forth the answer is no.
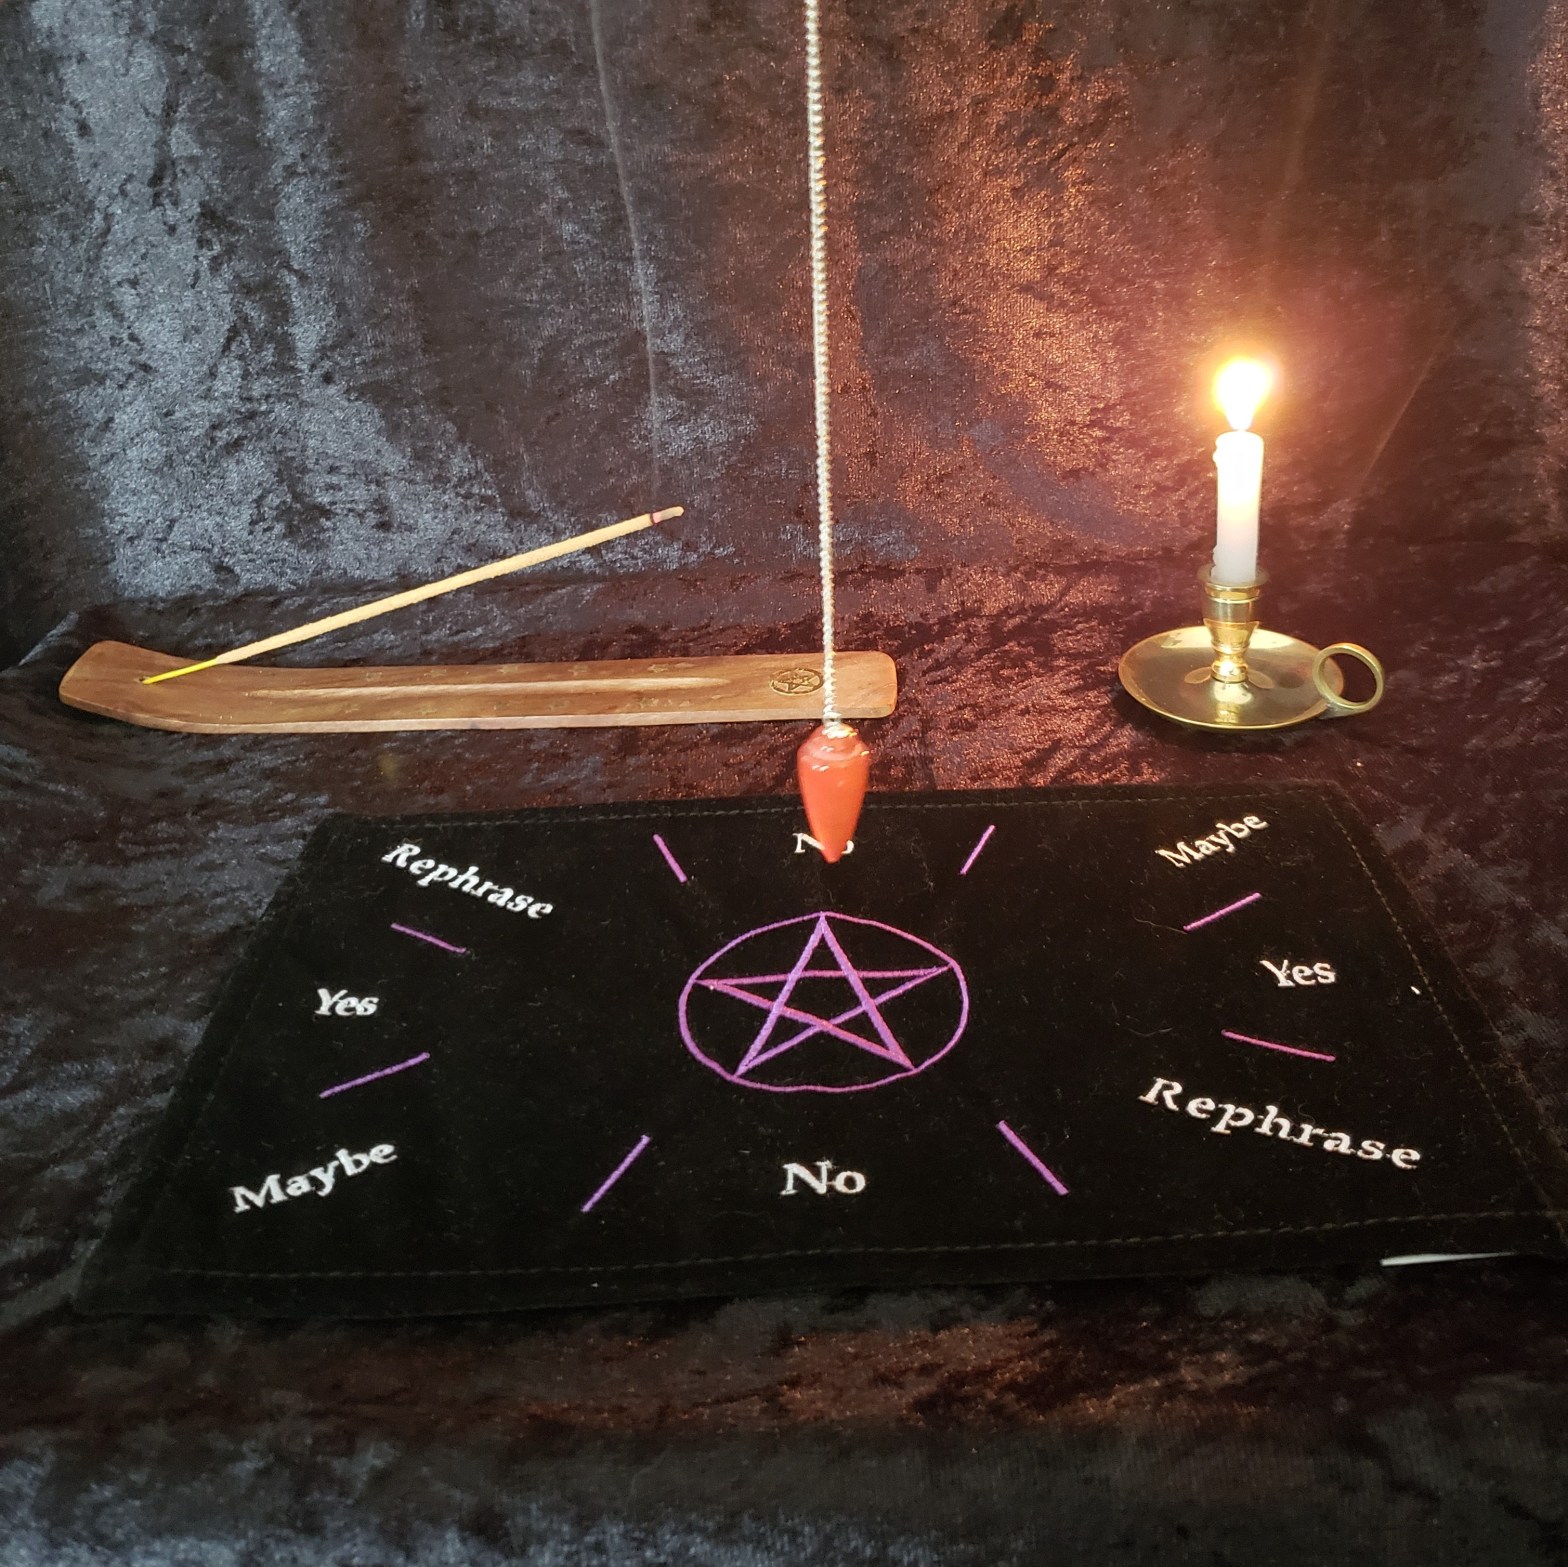
The easiest ways to determine which way you should read the answers are to decide beforehand which you want to use, use a pendulum board/mat with ‘yes’ and ‘no’ lines labeled, or ask simple questions you know the answers to (i.e. is my shirt blue? / is my hair red? / is it saturday? / etc) and see which way the pendulum moves for each answer. You can also just say “show me yes” and “show me no” to determine how the answers will look.
Pendulums
Pendulums can be made out of pretty much anything. Some say it should be a natural object, but you can use wood, metal, plastic, or whatever else you like. Your pendulum can be something as simple as a coin tied with a shoelace! What’s important is that you put your energy and your intention into it.
In terms of weight, some say you don’t want a large, heavy pendulum – one about the same weight as a penny will do. Others say the weight doesn’t really matter. It’s recommended to start with a medium weight pendulum so you can get used to it and practice.
One interesting type of pendulum you can make is a water pendulum. Fill a small vial or bottle with charged water. This water can be from a sacred well, pool, spring, river, lake, etc. or it can simply be water charged by the moon. The bottle must hang straight down on the thread – it won’t work properly if it’s crooked. Glue a ring onto the center of the cap or the center of the underside of the bottle and tie a thread to that.
The most common type of pendulum is a crystal pendulum. If you choose a crystal, it should have at least a slight taper to it. It is suggested to choose a stone about the size of the last two joints of your pinky finger. Quality is a key factor here as well. Attach a small copper, brass, or silver loop of wire to the larger end of the crystal with glue or epoxy.
Tie a piece of fine thread to the loop and trim off the excess. Some recommend silk thread, some say it must be natural fiber, but any thread is fine – even a fine chain made of gold, silver, brass, or copper works well. It is not recommended that you use aluminum, however, as the electrical process used in manufacturing can disrupt your auric field. The chain or thread should be between six and nine inches long, whatever feels right to you.
Most metaphysical shops will sell various types of pendulums so if you can’t make one, check out what your local shops have to offer!
Care and Keeping of your Pendulum:
It is important to purify your pendulum before using it, that way you can clear all the energies and contaminants in it. To start, fill a bowl with fresh, pure water. Hold the pendulum by the end of the thread over the bowl. Say a cleansing prayer of your choice. Here’s one example:
Earth Mother, Queen of Heaven,
Nameless Goddess of many names,
Persephone beneath the stones,
Artemis amid the groves,
Selene among the stars,
Wash from me my doubts and fears,
Purge me from my daily cares,
Cleanse my heart against my foes,
Bathe me in thy celestial dew,
Make bright the mirror of my soul.
As you say this prayer, fill the pendulum with your energy; charge it. Dip your pendulum into the water in the bowl and let it sit for several minutes. Visualize all contaminants and previous energies leaving it and flowing out into the water. Remove the pendulum by the end of the thread and visualize it shining with a white light. Place it on a clean towel and pour the water down the drain.
If there is a different way you would like to purify your pendulum, you don’t have to follow this method. Many different denominations of Wicca have different ways of purifying their tools before use. You may wish to consecrate your tool in a ritual. However you do it isn’t as important as filling it with your energy and intention.
Regularly cleansing your pendulum is important, especially if you use it often. This should be done monthly. There are many ways to cleanse your pendulum. One method is charging via moonlight. On the night of the full moon, set your pendulum where the moonlight will hit it for several hours. To increase the effectiveness of this method, you can place the pendulum in a bowl of clean water with a pinch of salt.
Another way to cleanse your pendulum is by using the elements. For earth: bury your pendulum in the earth (dirt, sand, salt, etc.) and let it sit for a few hours. For fire: place your pendulum in direct sunlight early in the morning and let it sit there until sundown. For water: place your pendulum in a glass of charged water and let it sit for several hours. (You can use moon water for this or charge water by letting a piece of clear quartz sit in it for 12 hours). For air: light sandalwood incense and pass the pendulum through the smoke three times. It can help to say a cleansing prayer or state your intent. (Nag Champa incense is very popular and contains sandalwood).
Some recommend keeping your tool wrapped after use in white linen or black/dark blue silk and storing safely away from the sun, as sunlight can neutralize the moon charge. Personally, I keep mine displayed on a pendulum rack! As long as you take care of your pendulum and charge it regularly, you don’t need to keep it hidden away.
Method:
To begin, you will use the same method mentioned in the previous blog post:
Darken the room and light with only a single, small light source such as a candle. Make sure the candle is located in a place that won’t distract you. The background should be basic, with nothing to distract you from your scrying tool. It is common to burn incense. Quiet, simple music can be played in the background if you so desire.
Cast your circle, say a protective prayer, invoke your deities, and begin scrying. Put the elbow of your scrying hand on the table. Hold the end of the thread between the fingers of your scrying hand. Ask your questions and observe the answers, using the interpretation of your choice. Once you are finished scrying, close your circle, thank your deities, and say a closing prayer. Extinguish your candle and incense and return your scrying materials to storage.
One of the great things about this method is that it can be done on the go! You don’t need any fancy tools to carry around with you, even a pendant can be used. If you’re in a place or a situation where you can’t follow all the above steps, just say a protective prayer before scrying with your pendulum and you’ll be good to go.
Next week we’ll talk about another method of scrying – ouija board scrying! So check back soon!
Sources:
Buckland, Raymond. Buckland’s Complete Book of Witchcraft. St. Paul, Minn., U.S.A: Llewellyn Publications, 1986. Print.
Buckland, Raymond. Wicca for One. New York, NY, U.S.A: Kensington Publishing Corp., 2018. Pring
Fire scrying, also referred to as pyromancy, is an ancient method of scrying that dates back to the seventh century B.C. and has been practiced in many cultures around the world. As I mentioned last week, fire scrying and fire divination are different. Fire scrying is looking for images in the fire while fire divination is interpreting the movements and shapes of the flame. Fire divination doesn’t require psychic ability.
This week we’re going to talk about another form of fire scrying – fire gazing. Unlike lamp/candle scrying, this method involves gazing into the embers of a fire rather than the flame itself. You can do it indoors in a fireplace, or outdoors in a campfire or bonfire.
*Please practice proper fire safety when fire scrying! I’m not responsible for any fire related accidents*
Indoors
If employing this method indoors, build a fire in your fireplace. Some sources say to use hardwood, some say to use old, weathered wood. Others don’t specify any type of wood. It’s important to do what feels right to you.
Some sources say to let the fire burn until it begins to die down, then lay a cedar or juniper log and three handfuls of sandalwood chips on the fire. This step is optional. While the fire is still roaring, ask your question and gaze into the fire as it burns down.
Once the fire has burned down, gaze deep into the embers. Sit silently and watch the changing colors and varying brightness. After a time, you will start to see images appear. You may even hear messages in the crackling sparks. The images you see may be scenes of the past, present, or future, or they may be more symbolic and require interpretation.
Only gaze for about five minutes at a time to avoid straining your eyes.
Outdoors
If employing this method outdoors, the steps are very similar. Some sources suggest you should make a driftwood fire on the seashore after sunset. If you can’t, old weathered wood or hardwood is suggested. Again, choose what feels right to you.
The rest of this method is the same as the indoor version; ask your question as the fire burns, then gaze into the embers once it dies down. You will see images or hear messages.
Method
To begin, you will use the same method mentioned in the previous blog post:
Start your fire. Darken the room (if inside). The only light source should be your fire for scrying. It is common to burn incense.
Cast your circle, say a protective prayer, invoke your deities, and begin scrying. Stare directly into the flames and ask a question. Once the fire dies down, gaze deep into the embers. After a while, you’ll see images appear in the embers. Observe with an absent mind and reflect on your experiences later.
Once you are finished scrying, close your circle, thank your deities, and say a closing prayer. Extinguish your fire and incense.
Next week we’ll talk about another method of scrying – pendulum scrying! So check back soon!
Sources:
Buckland, Raymond. Buckland’s Complete Book of Witchcraft. St. Paul, Minn., U.S.A: Llewellyn Publications, 1986. Print.
Fire scrying, also referred to as pyromancy, is an ancient method of scrying that dates back to the seventh century B.C. and has been practiced in many cultures around the world. Before we get into it, let’s talk about the difference between fire scrying and fire divination. Fire scrying is “the art of obtaining extrasensory information by the agents of the unconscious mind in the form of sensory metaphors” and fire divination is “the interpretation of various motions and shapes of flames and its related phenomena according to a set system of rules.” In layman’s terms, fire scrying is looking for images in the fire while fire divination is interpreting the movements and shapes of the flame. Fire divination doesn’t require psychic ability. Today we’ll be covering fire scrying.
History
First, let’s talk about the ancient Egyptian/Babylonian art of lamp scrying. This method involves scrying in the fire of an oil lamp. Traditionally, this “lamp” was a low, open stone dish full of oil. The oil used was a “clear Oasis oil.” A strip of white linen was coiled inside and draped over the lamp. The end of the wick was lit and as it burned, more and more of the wick was pulled out and draped over the lamp so it could continue burning. The dish was red, to symbolize Set, god of evil.
The lamp was set on a table with the scryer sitting on the west side, facing east. Egyptian houses were built at ground level, with only packed mud or paving stones as a floor. Because of this, the scryer and the table were rested upon new bricks so as to break direct contact between the scryer and the earth.
It was common for the scryer to paint their eyes before scrying. The eye makeup was bold, with utchat symbols drawn on the eyes. The utchat is the traditional eye symbol often seen in Egyptian art. The utchat of Thoth was painted on the left eye and the utchat of Ra was painted on the right eye. The utchat of Ra is shown below; the utchat of Thoth is the same, but with a wide crescent shape underneath. These were often referred to as the white eye (left) and the black eye (right) of Horus. They represented the sun and moon, respectively. Often, juice of mugwort or vervain was mixed with this eye makeup and painted on the lids, forehead, and between the eyebrows to help induce the mental state of scrying.
Practice
When practicing this method of scrying, you don’t have to stick too close to tradition. For a lamp, you can create one with artist’s clay, use a small ceramic or stone dish with a broad rim, or even use a small ashtray. It’s important that this dish, whichever you choose to use, is new. Don’t use a soiled one, no matter how well you clean it. Although the Egyptians used red lamps specifically, you should avoid this color. Red is meant to symbolize Set, god of evil, so this color will bring darker entities. For the oil in the lamp, any vegetable oil will do – the clearer the better.
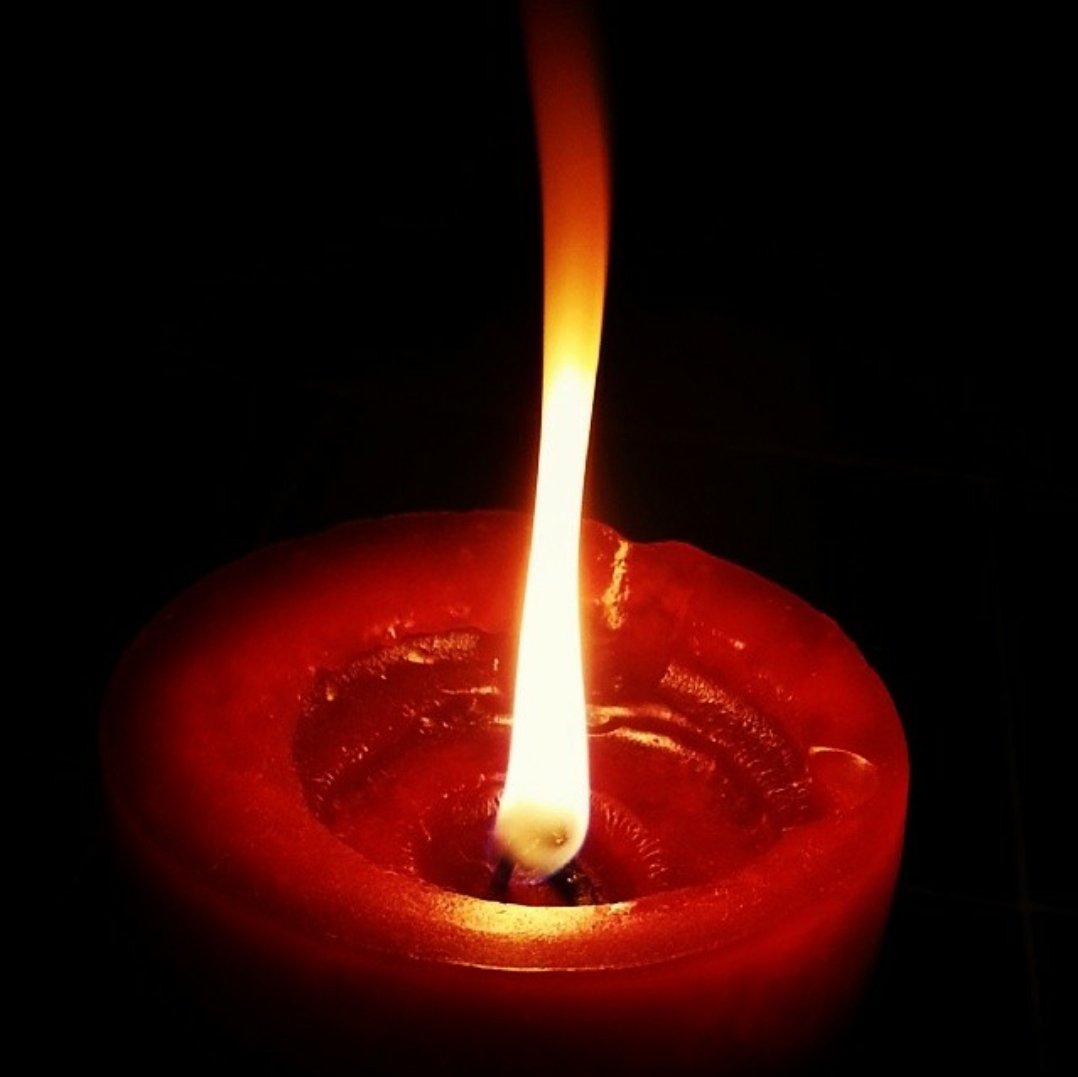
If you wish, you can even use a candle instead of a lamp. This technique is much simpler, since you don’t have to attend to it and adjust the wick as it burns. You can use specific scents you like associated with the seven days, though it’s better to use just one or none at all if you can’t find ones you like. You can implement these scented oils in the oil of your lamp or to anoint the candle. Alternatively, scented candles can be used. You can also choose to simply burn incense instead.
**IMPORTANT** if you decide to use scented oils, please make sure they are safe for pets if you have them! Certain oils can have serious or even deadly effects on animals, so do your research beforehand.
Since modern houses are elevated from the ground, the act of elevating yourself and your scrying table is more symbolic than practical and totally optional. If you wish to do it, you can buy ceramic floor tiles in a natural color or use actual bricks. If you use bricks, make sure they’re not too bright of a red, for the same reasons as the lamp. These tiles or bricks should be placed beneath each leg of your chair and scrying table. Also, make sure to elevate your feet.
The act of painting your eyes for this scrying method is optional as well. If you choose to do it, blue and green are appropriate colors to use. You can go simple and just use these colors, or you can draw on the utchat symbols described above. You can also use the juice of mugwort, vervain, or other scrying herbs on your eyelids, forehead, and between your eyebrows, as described above. Take care not to get any in your eyes.
Setting Up
With this method, it’s common to work with the greco-roman gods who rule the days, as they are more common than the Egyptian gods. I included both for reference, though you can work with whichever deities you’re comfortable with. If you plan to work with these planetary deities often, read up on them beforehand. Whichever deity you choose to work with, make sure you have a clear mental image of them before you start. The gods of the days are shown below in the chart:
To implement this method of scrying, stare directly into the flame. Don’t look away and don’t be afraid. After a while, you’ll start to see a light shining out from the flame of the lamp; this is spiritual radiance and will be brighter than the color of the usual flame. Address your deity and chant an invocation to them. You should chant so that your breath strikes the flame. Repeat your chant seven times. There’s no need to memorize this; what’s most important is that your intention is there.
Continue to focus on the flame. You should begin to see shadows off to the sides. Make sure you don’t look directly at them, or they’ll vanish. Try focusing on them with your peripheral vision; this may take some practice. Watch the shadows and shapes out of the corners of your eyes until they indicate the presence of your deity. Direct them by their name to present the desired information. The form with which your deity presents information to you depends on your scrying ability level; if you’re better at images and visual scrying, you will probably see images, if you’re more receptive to sounds, you will hear sounds, etc.
If your scrying abilities are more limited, look for any signs they may be trying to use to communicate. Usually these will be responses to yes or no questions. These can be anything, for example: feeling a touch on your face, feeling the sensation of a breeze on your skin, feeling a stirring within your body, seeing a bright flash of light, seeing movement in the edge of your vision, hearing a musical tone in your head, hearing a knock on the table, floor, door, or some other part of the house, etc.
Method
To begin, you will use the same method mentioned in the previous blog post:
Darken the room. The only light source should be your lamp or candle for scrying. The background should be basic, with nothing to distract you from your scrying tool. It is common to burn incense, unless your candle or lamp is scented. Quiet, simple music can be played in the background if you so desire.
Cast your circle, say a protective prayer, and begin scrying. Stare directly into the flame. After a while, you’ll see a spiritual radiance. Chant an invocation to your deity so that your breath strikes the flame and repeat seven times. You should begin to see shadows and shapes off to the sides – observe them with your peripheral vision. Once they indicate the presence of your deity, direct them by their name to present the desired information. Observe with an absent mind and reflect on your experiences later.
Once you are finished scrying, close your circle, thank your deities, and say a closing prayer. Extinguish your candle and incense and return your scrying materials to storage.
Next week we’ll talk about another method of fire scrying – fire gazing! So check back soon!
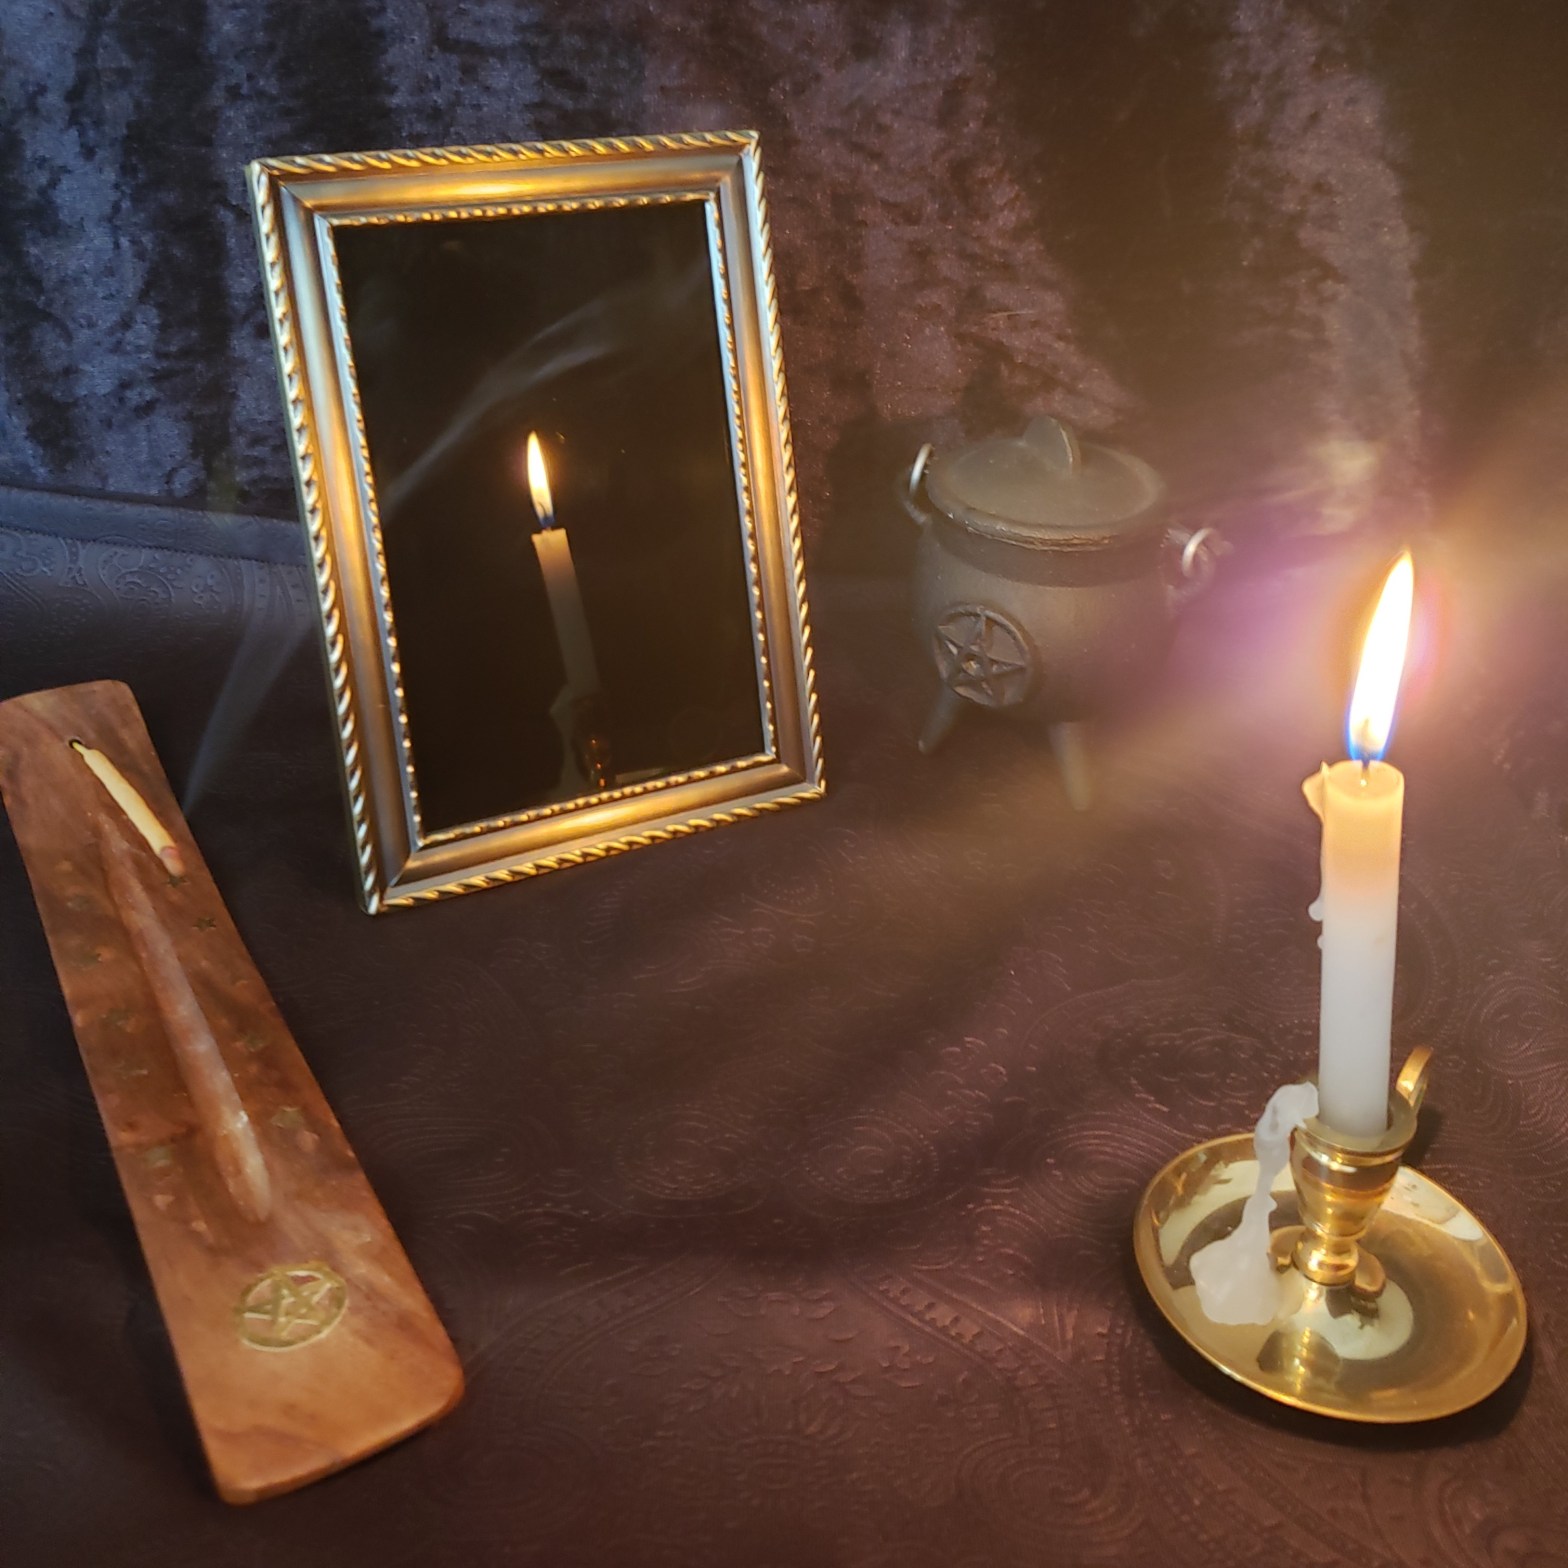
My favorite method of scrying is mirror scrying. Mirror scrying is an evolved form of water scrying, like crystal scrying. It’s simple enough to learn – you just need a mirror to scry in. Any mirror can be used to scry, but black scrying mirrors tend to work better. Regular mirrors are designed to reflect everything as brightly and clearly as possible, which can be very distracting to a scryer. Since you look for visions, not reflections, it’s much easier to scry using a black mirror. The size and shape of the mirror don’t matter, what matters is if the mirror feels right to you. It’s all about intuition. (Check out our selection of scrying mirrors in our shop! https://northernlightswicca.com/scrying-mirrors/)
Obsidian and Jet are two great materials for scrying mirrors. Jet is especially great because of its electrical properties. It is often said that electricity is associated with psychic ability. A shallow bowl or plate made of black glass also works well, provided it is curved and has no scratches. Even a small beach stone polished with oil will work for mirror scrying.
It’s important to take care of your scrying tools. When not in use, you should keep your scrying mirror wrapped in black silk or velvet or white linen. Some sources say you shouldn’t let anyone else touch your scrying mirror, since it’s your tool alone. Your mirror can be charged by leaving it out in the light of the full moon for a few hours. Like crystal scrying, this is usually done about once a month, but experiment to see what works best for you.
Background
When using your mirror to scry, you don’t need to angle it the way you would to look into a regular mirror. Remember, you’re seeking visions, not reflections, so you can leave the mirror flat on the table in front of you or stand it up any way you want. It can help to imagine the surface of the mirror is liquid and that you’re looking far into its depths.
As you begin scrying, just like the crystal method, you will start to see smoke or clouds. At first, the mirror will brighten to gray, then colors will begin coming and going quickly across the mirror’s surface. You will see all sorts of colors pass through. Each color has its own meaning, though you shouldn’t attach too much importance to these colors unless they are persistent and keep returning. The colors can be interpreted by this chart from Donald Tyson’s book Scrying for Beginners:
White - in general, good
       Pure white - truth, purity of purpose
       Brilliant white - spirituality, joy
       White shot with gold - revelation, prophecy
       Cream white - presence of angels
Yellow - in general, intellect
       Bright yellow - playfulness, mind games
       Pale yellow - abstract thought
       Yellow ochre - willfulness, mental dominance
       Golden yellow - creativity
Orange - in general, ambition
       Dark orange - pride
       Bright orange - achievement
       Pale orange - knowledge, teaching
       Dirty orange - selfishness
Red - in general, anger
       Scarlet-orange - indignation, righteous anger
       Vivid scarlet - fury, rage, violent impulse
       Dull crimson - sexual desire
       Bright crimson - emotional love, friendship
       Rose - spiritual love, devotion
Green - in general, desire
       Gray-green - deceitfulness
       Dark green flecked with scarlet - jealousy
       Spring green - flirting, teasing
       Emerald - sympathy, empathy
Blue - in general, devotion
       Deep blue - adoration
       Sky blue - self-sacrifice
       Pale slate - religious awe
       Blue-white - superstitious fear
       Violet-blue - idealism
Purple - in general, health
       Red-purple - animal vitality
       Dark purple - brooding, obsessive thoughts
       Pale purple - weakness, sickness
       Dirty brown-purple - insanity
       Blue-purple - perverse fantasies, erotic dreams
Brown - in general, materialism
       Bright brown - acquisitiveness
       Dull brown - miserliness, hoarding
       Rust - prideful possession, vanity
       Dark brown - envy, collecting mania
Gray - in general, sorrow
       Deep slate gray - depression
       Leaden gray - fear
       Putty gray - tedium, boredom
       Mist gray - emptiness
Black - in general, evil
       Glossy black - spite, vindictiveness, pettiness
       Dull black - brooding evil, murderous thoughts
The colored clouds you see in the mirror will not remain static, but will billow like smoke and move through the depths of the mirror restlessly. These movements also have meanings, but again, don’t attach to much importance to the movements unless they’re persistent and keep returning. The movements can be interpreted by this chart from Donald Tyson’s book Scrying for Beginners:
Clouds forming on the left - material matters, manifestations
Clouds forming on the right - ideas, insights, spiritual metters
Clouds moving left to right - approach of spirits, beginning
Clouds moving right to left - withdrawal of spirits, ending
Clouds rising - revelation, affirmation (yes)
Clouds falling - concealment, negation (no)
Some people don’t even see clouds when they scry. The colors and movement could come in the form of many things, like rushing water, flashing lights, or moving shadows. Each person is different and will have different experiences. Whatever they appear as, you shouldn’t have any trouble seeing them if you fix your gaze strongly at the center of the mirror and look through it like a pane of glass.
Over time as you get better at scrying, you can start to think of specific questions while watching these clouds pass through the mirror. The clouds will start to respond to your thoughts and change color and motion depending on your question. You can gain useful information this way without ever having to see visions or hear voices. It tends to be more difficult to see detailed images than to see these clouds. Remember, scrying isn’t a talent that will necessarily come naturally to you, but hard work can make up for a lack of innate talent, so keep practicing.
When you see visions through the scrying mirror, they may appear tiny and far away. It’s important not to attempt to pull these images closer, as this will make them disappear. Continue to look deeper into the mirror at these images and allow them to approach. Don’t try to interact with these figures. They may acknowledge you or try to talk to you. If this happens, simply remain passive or nod politely.
Method
To begin, you will use the same method mentioned in the previous blog post:
Darken the room and light with only a single, small light source such as a candle. Make sure the candle is located in a place that won’t distract you. The background should be basic, with nothing to distract you from your scrying tool. It is common to burn incense. Quiet, simple music can be played in the background if you so desire.
Cast your circle, say a protective prayer, invoke your deities, and begin scrying. Gaze strongly at the center of the mirror and look through it like a pane of glass. Keep your mind blank. After some time, you will see the mirror brighten to gray, then colored clouds will begin to billow like smoke and move through the depths of the mirror restlessly. These clouds will clear to reveal an image. Observe it with an absent mind and reflect on your experiences later.
Once you are finished scrying, close your circle, thank your deities, and say a closing prayer. Extinguish your candle and incense and return your scrying materials to storage.
Next week we’ll talk about another method of scrying – egyptian lamp scrying! So check back soon!
Sources
Buckland, Raymond. Buckland’s Complete Book of Witchcraft. St. Paul, Minn., U.S.A: Llewellyn Publications, 1986. Print.
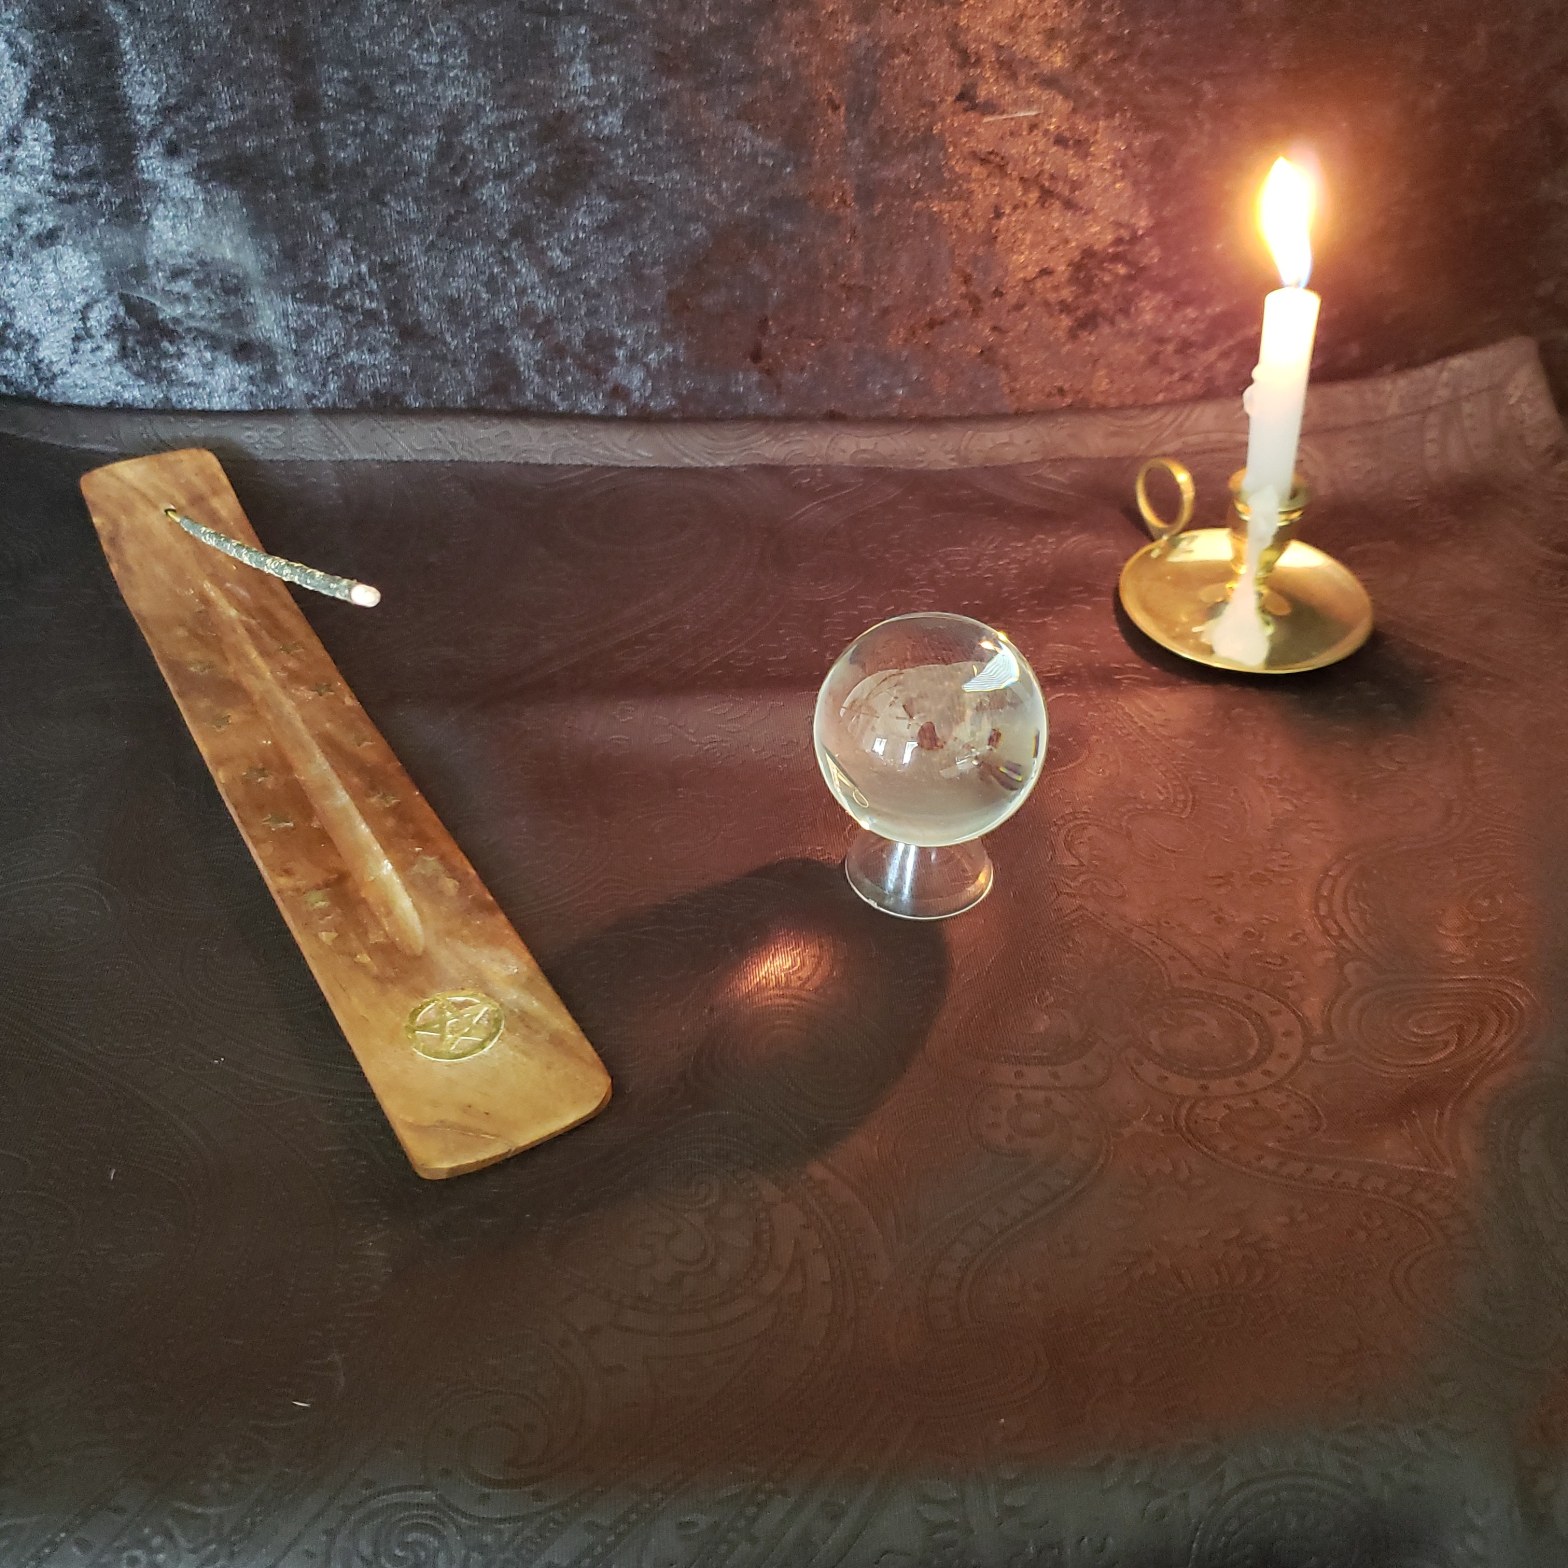
The method of crystal scrying is almost as old as water scrying. It involves the use of a clear quartz sphere, traditionally. The size of the crystal doesn’t matter, what’s more important is the clarity. Most sources say the crystal should be flawless; no scratches, bubbles, etc. You can also use glass in place of a crystal, since clear quartz can get expensive. A glass sphere or convex magnifying glass lens will work almost as well as crystal. You also have the option to use a plastic sphere (acrylic, plexiglass, etc.) but these scratch easily and are made from unnatural materials so they will not focus or strengthen your scrying ability.
It is important to take good care of your scrying crystal. It’s common to charge it by the light of the full moon. Usually this is done about once a month, but experiment to see what works best for you. To increase the effectiveness of this moon charging, place your crystal in a bowl of water with a pinch of salt. Another method of charging is to rub your crystal with fresh mugwort. This also increases its ability.
When not in use, you should wrap your crystal in black velvet or silk and keep it in a safe place. You shouldn’t let anyone else handle it. Make sure you don’t ever let sunlight strike your crystal! (This is less about the spiritual side of things and more about potentially setting your house on fire! Be careful!)
Setup
When scrying with a crystal, you should work alone in a dark, quiet room. Most sources say to have a small, single light source in the room, like a candle, though it can be done in total darkness. Your candle should be placed in a spot that doesn’t reflect in the crystal and distract you. You can also throw a dark cloth over your head and shoulders as you lean over the crystal or build a scrying box.
A scrying box is simply a box that you have lined with black velvet or painted matte black. The top opens so that you can look inside at your crystal. A dark cloth thrown over the head and shoulders will work well with this method. You can also use a lighter colored cloth to better control the amount of light you let in.
The ideal place for scrying would be your temple, though this depends on your beliefs. Any room will do fine as long as you won’t be disturbed. It’s common to burn a favorite incense while scrying, as this can help you concentrate. According to your beliefs, you may want to work in a consecrated circle.
Background
To use the crystal scrying method, simply sit and gaze into the crystal. You should focus on the center, not the surface. Look through it like a window. Keep your mind blank; try not to imagine anything. Don’t forget to blink! You don’t want to strain your eyes. After some time, you will start to see the crystal fill with a sort of mist. Some sources say you will see thick, grey mist like rolling thunderclouds that transforms into a milky white mist. Other sources say you will simply see a white mist. Whatever type of mist you see, it will fill the ball completely, then start to fade away leaving an image. These images may appear tiny and far away, but very clear and bright at first. You may see them in black in white, though it is more likely to see them in color. You may experience these images without sound. They can be still or moving and can show the past, present, or future. More often than not, these images will be symbolic and will require interpretation.
When scrying, it’s not uncommon to experience things outside of the crystal. You may see visions in the air around you, hear voices, or even smell things. Whatever you experience, make sure not to focus too hard on it or it will disappear. Observe it with an absent mind and reflect on your experiences later. With practice, you can start to focus your awareness more directly on the images without losing them. There is no right way to do this; you have to try new things, observe your mistakes, and learn by experience. The correct way is the way you find that doesn’t banish your visions.
At first, you won’t have a lot of control over what you see. However over time and with practice, you can begin to meditate on what you want to see before beginning. Don’t be discouraged if you aren’t seeing anything at first. It doesn’t always come immediately. Don’t try for more than about 10 minutes at a time. If you’re not getting anything after this time, stop and try again the next day. It may take more than a week for you to start seeing things through scrying.
A good method to try if you’re still having trouble is the Method of Miss X (Miss Goodrich Freer). This method is simple; look around the room and choose an object to focus on. Close your eyes and mentally transfer the image of that object into your crystal. When you open your eyes, you should see that image in the crystal. Once you start to see success with this, try with a strong memory. Imagine the memory with your eyes closed and mentally transfer the image of that memory into the crystal, like before. Again, when you open your eyes you should see that image in the crystal. This method will help shift your mind into the correct, receptive mindset for scrying.
Method
To begin, you will use the same method mentioned in previous blog posts:
Darken the room and light with only a single, small light source such as a candle. Make sure the candle is located in a place that won’t distract you. The background should be basic, with nothing to distract you from your scrying tool. It is common to burn incense. Quiet, simple music can be played in the background if you so desire.
Cast your circle, say a protective prayer, invoke your deities, and begin scrying. Gaze into your crystal, focusing on it’s center, looking through it like a window. Keep your mind blank. After some time, you will start to see the crystal fill with mist. It will fill the ball completely, then start to fade away leaving an image. Observe it with an absent mind and reflect on your experiences later.
Once you are finished scrying, close your circle, thank your deities, and say a closing prayer. Extinguish your candle and incense and return your scrying materials to storage.
Next week we’ll talk about another method of scrying – mirror scrying! So check back soon!
Sources:
Buckland, Raymond. Buckland’s Complete Book of Witchcraft. St. Paul, Minn., U.S.A: Llewellyn Publications, 1986. Print.
Cunningham, Scott. Wicca: a Guide for the Solitary Practitioner. St. Paul, Minn., U.S.A: Llewellyn Publications, 2003. Print.
Water scrying is one of the oldest and most traditional method of scrying. It was made famous by French physician Michel de Nostradame (commonly referred to as Nostradamus). Nostradamus didn’t write much about his methods of scrying; two quatrains from the first century represent nearly all we know:
Gathered at night in study deep I sat,
Alone, upon the tripod stool of brass,
Exiguous flame came out of solitude,
Promise of magic that may be believed.

The rod in hand set in the midst of the Branches,
He moistens with water both the fringe and foot;
Fear and a voice make me quake in my sleeves;
Splendor divine, the God is seated near.
Materials
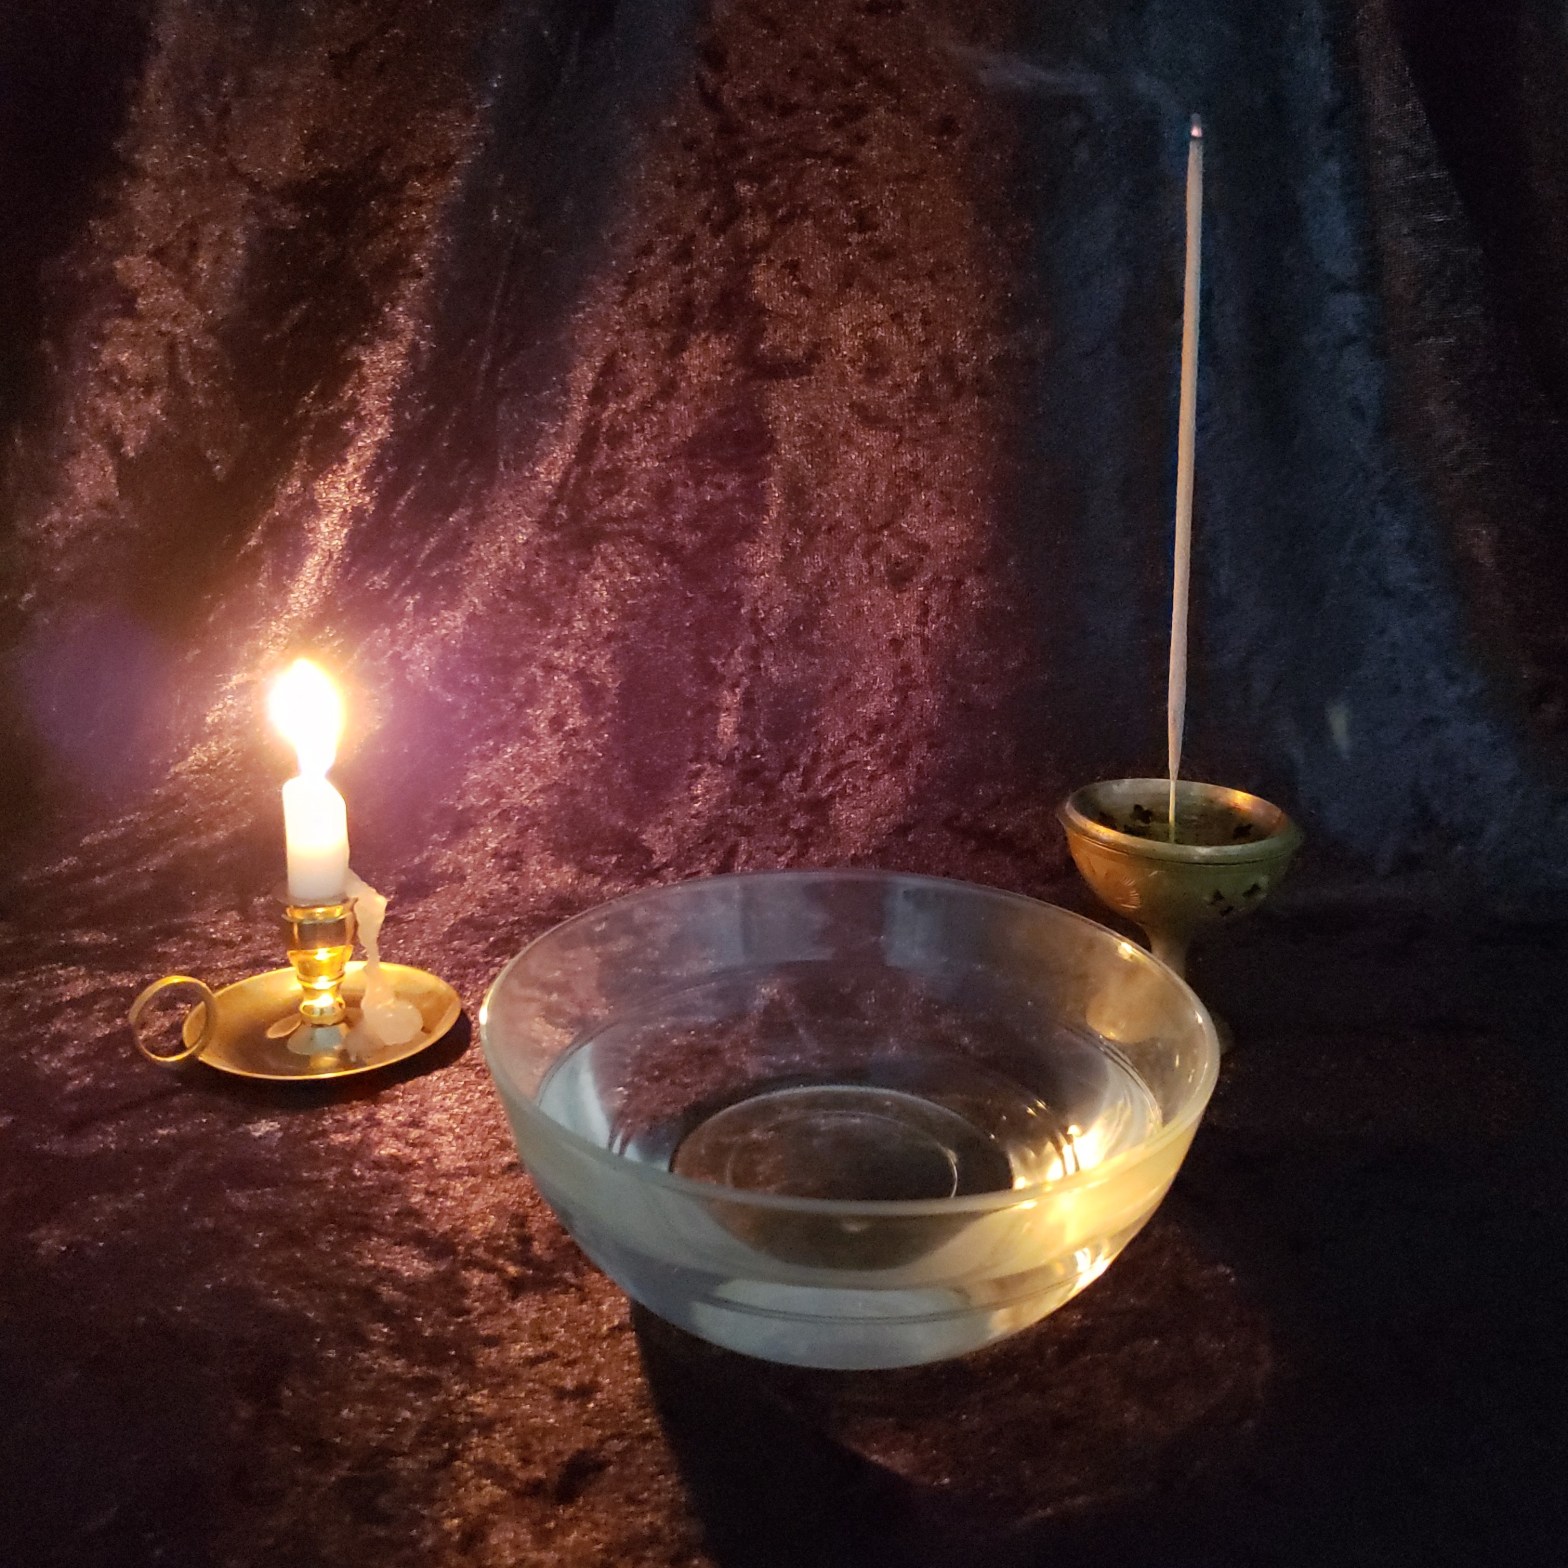
Given our best translation, here is how to use the Nostradamus method of water scrying. First, you will need a large deep bowl or dish, ideally made from glass, brass, or silver. Generally, the best type of bowl to use is a deep, rounded one, as this gives a more bell-like tone. Don’t feel like you have to go out and buy something fancy, though; a simple kitchen mixing bowl works just fine. Whatever type, the bowl should have a smooth, even rim (we’ll talk about why later).
The bowl traditionally should be set on a short pedestal base made of brass or laurel boughs. Using a small cushion is fine as well; the bowl simply needs to be elevated enough to allow it to vibrate freely. Feel free to experiment to see which bowl works best for you, how much water to fill it with, and how to elevate it for the best sound.
The water used in the bowl should be collected from a freshwater pond, spring, stream, river, lake, or other moving source of water. You should never collect water from a stagnant or polluted source. If at all possible, find a fountain or natural spring with supernatural properties to collect your water from. After use, the water can be stored and used again for future scrying. Make sure to discard it before it gets cloudy or contaminated, though. It’s best to collect new scrying water once a month, preferably during the full moon and under the light of the moon. Tap water works just fine if you bless it (however your faith dictates) and sea salt can be added for extra protection if desired. If you can’t collect the water in the light of the full moon, pour the water into a sealed vessel after it’s collected. Place this vessel in the light of the full moon. The vessel should be clear so the light can shine through it. After it’s charged, wrap the vessel in white linen or blue silk and store until use.
The wand used for this method of scrying is traditionally made of laurel or bay, but hazel or willow work just fine as well. It’s best to collect it fresh so there will be dried sap or resin on it. Otherwise, some rubber tubing slipped over the end of the wand will work. This will allow the wand to catch the edge of the bowl so it will resonate and vibrate, like a singing bowl. This is why it’s important to have a smooth, even rim on your bowl.
Method
To begin, you will use the same method mentioned in the previous blog post:
Darken the room and light with only a single, small light source such as a candle. Make sure the candle is located in a place that won’t distract you. The background should be basic, with nothing to distract you from your scrying tool. A blank wall would do well, or a simple, black cloth. It is common to burn incense. No music should be played while using the Nostradamus method.
Cast your circle, say a protective prayer, invoke your deities, and begin scrying. Dip the end of the wand in the water until thoroughly wet. Start moving the want around the rim of the bowl in a clockwise, circular motion, allowing water to trickle off the end of the wand and onto the rim of the bowl. The wand should slip around the edge of the bowl and begin to resonate, producing vibrations. If you’re having trouble with this, try using the index finger on your dominant hand in place of the wand. Hold the wand crosswise in your dominant hand so it passes over the basin while you circle it.
The bowl should start to produce a tone. Listen to the sounds and watch the ripples in the water. Allow these things to lull you into a receptive state. Every now and then, stop moving your wand of finger and listen to the harmonies as they fade away. Look deep into the water and past it using your third eye. You should begin seeing (hearing, smelling, tasting, feeling) the information you seek.
Once you are finished scrying, close your circle, thank your deities, and say a closing prayer. Extinguish your candle and incense and return your scrying materials to storage.
Next week we’ll talk about another method of scrying – crystal scrying! So check back soon!
Sources
Buckland, Raymond. Buckland’s Complete Book of Witchcraft. St. Paul, Minn., U.S.A: Llewellyn Publications, 1986. Print.
Palm, Diana. Mediumship Scrying & Transfiguration for Beginners: A Guide to Spirit Communication. United States, Llewellyn Worldwide, Limited, 2017.
Scrying is an ancient art that allows a person to see into the past, present, or future. It is defined in Donald Tyson’s book Scrying for Beginners as “the deliberate act of perceiving events that lie beyond the range of the physical senses by using the agents of the unconscious mind.” In layman’s terms, it is a psychological technique used to gain information through the mind in the form of “sensory metaphors.” These metaphors are information shaped by the unconscious mind into forms that allow us to understand them. They can come in the form of images, sounds, tactile sensations, smells, tastes, or feelings. In some cases, they can come in the form of involuntary movements.
The act of scrying is considered automism, which is defined as “functions or inhibitions of the body not controlled by the conscious self.” There are two types of automism: sensory and motor. Sensory automism, or passive automism, is the stimulation of the senses by the unconscious mind and is used in types of scrying like crystal gazing, mirror gazing, aura reading, etc. Motor automism, or active automism, is where the body moves of its own free will and is used in types of scrying like ouija boards, dowsing rods, pendulums, etc.
Method
The method for scrying is the same among all types – that is, the same general steps are taken. To scry, awareness is concentrated on a physical object in order to open the mind to receive information. The focus can be on anything, from the location of a lost object to the history of a specific person. It’s best to concentrate on what information you’re looking for before beginning, otherwise any information could be received and could therefore be more difficult to interpret. Don’t be discouraged if you can’t control what you see at first, don’t see anything, or if you find it difficult to enter the receptive, open-minded state. It becomes easier over time and with practice. Scrying is a lot like any other talent; anyone can do it, some people are naturally better at it, and with practice, the skill can be developed. When scrying, if nothing is happening, stop after 10 minutes and try again the next day.
To begin, a sacred space is needed. This can be an entire room devoted solely to the paranormal or even a small corner. It is important that you are not disturbed when scrying, so turn off all distractions and ensure no one will interrupt you. Scrying is an art that is done alone. Depending on your beliefs, you may want to bathe beforehand to cleanse and relax yourself. At the very least, wash your hands and face. You may say a cleansing prayer at this point. Some choose to wear a special article, such as a headband, necklace, ring, etc., when scrying as a sort of ritual item. This, again, depends on your belief and is entirely optional.
To set up, the room should be lit with only a single, small light source such as a candle. Make sure the candle is located in a place that won’t distract you. The background should be basic, with nothing to distract you from your scrying tool. A blank wall would do well, or a simple, black cloth. It is common to burn incense. Quiet, simple music can be played in the background if you so desire.
The first step to begin scrying is to establish your sacred space or cast your circle. There are many ways to do this and the process depends on your beliefs. The most basic method, however, is to imagine yourself surrounded by a white light that extends around the space you are working in. Often, a protective prayer is said and the appropriate deities are invoked. You may begin.
Once you are finished scrying, you must absorb your sacred space or close your circle. Again, the method depends on your beliefs, but the most basic is to imagine the light that surrounds you shrinking down until it disappears. If invoked, deities are thanked at this point and often a closing prayer is said. The candle and incense are extinguished, any music turned off, and scrying materials returned to storage.
It is important to record everything after each scrying session so you can interpret what you saw and identify any patterns over time. You can also start to see what the best conditions for scrying are, such as time of day, day of the month, weather, etc. All scrying materials should be kept in a special place when not in use, such as a chest or box. This should be kept in a place where it won’t be disrupted and should be kept clean and orderly.
Next week I’ll start talking about the specific forms of scrying.
Sources
Buckland, Raymond. Buckland’s Complete Book of Witchcraft. St. Paul, Minn., U.S.A: Llewellyn Publications, 1986. Print.
Hello, merry meet, and welcome to our blog! We will be posting periodically about all things wiccan. If there’s a topic you’d like us to discuss, just contact us and let us know. Come back soon for updates! Blessed be 🙂